ID卡製造方法教學(英文)
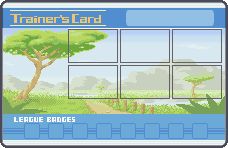
The first thing you need to do is to find a template. There are lots of different templates, but for now, just click here and choose one. For this tutorial, we will use this template.
Now, we need to right-click the template and click copy. Now open up Paint, or MS Paint.

This will get rid of the white outline around the image. Now press Ctrl†V or go to Edit then click Paste on the top toolbar to paste your template.

Step Two
Adding Pokemon
Now, you may want to zoom-in for this, so select the zoom-in tool and click your template.

Now that we're zoomed in, it's time to add our Pokemon. Select one of the squares (making sure you select the border too) and copy it (use Ctrl†C or Edit then Copy on the toolbar).

Now, paste the square below the template. Select the inside of the square (not the border) and press delete. You should now have a white space where the Pokemon will go.

Now, copy and paste the white box five times, so that we have one for each of the six Pokemon.

Now, choose your six Pokemon sprites. Click here for the links to Pokemon sprites. Right click the sprite you want, copy it, and then paste it onto Paint/MS Paint.

Now, grab one of the boxes and move it over the Pokemon.

Now, delete everything outside the box.

Now, select the Pokemon in the box and put it back onto the template. Make sure you line it up correctly.

Now, repeat those steps for the other five Pokemon!

Step Three
Adding badges This is one of the easier steps. All you do is copy one of the following badge sets.
Kanto:

Johto:

Hoenn:

Sinnoh:

Orange Islands:

Silver Battle Frontier Symbols:

Gold Battle Frontier Symbols:

(華麗大賽及pokemon ranger的徽章在帖尾)
Now, paste the badge set onto MS Paint/Paint. Select it, and place it on top of the area where the badges go. Try to line it up correctly.

Step Four
Adding a Trainer Click here for links to trainer sprites. Choose the trainer you want and copy and paste it straight onto the template, like so.

Easy, see!Step Five
Adding text Click the "A" tool to add text. Click where you want the text to go. You can choose whatever type of font you like, but I like to use Verdana, size 10.

Step Six
Saving and Uploading Now that your trainer card is finished, you can move it to the corner of the page.

Now, using the point (highlighted in red) move the edge of the canvas so that it just surrounds the trainer card, like this...

Now, saving the image. To get the best quality image, you should save your trainer card as a .PNG (highlighted here in red).

And there you go, your very own trainer card! Now all you have to do is upload it. If you don't know where to upload it, try http://www.tinypic.com. Uploading on http://www.tinypic.com First, go to http://www.tinypic.com. Then click Browse (highlighted in red below).

Now, select the Trainer Card file that you want to upload, and then click Open.

Now, press Upload Image.

Once it's finished uploading, you should see something like this:

Step Seven
Adding to a page To add your trainer card to your forum signature/post use this code:

To add your trainer card to your website use this code:

THE END |


 收藏
收藏 分享
分享 撐
撐 踩
踩 提升卡
提升卡 變色卡
變色卡 千斤頂
千斤頂